
Caption Overview
Before digging into the steps to add captions to your videos and events, let’s define some key terms.
- Live captions: a textual version of audio automatically generated and provided on a screen that helps everyone better comprehend the audio of a live event
- Closed captions: a textual version of audio provided on the screen to help viewers comprehend the audio of a recorded video. Closed captions provide a textual version of background noises and identify speakers. Typically closed captions can be turned on and off.
- Subtitles: a translation of the video audio into another language. It is assumed that the audience can hear the audio, but cannot understand the language.
- Transcript: a textual version of audio presented in a document format
- Third-party captioning: live or closed captions that are provided by an organization external to Penn State. If an organization is providing live captioning, they will need to log into the event remotely and transcribe the audio. If an organization is providing closed captions, you will have to provide the recorded video to them, so that they can generate the captions.
- Accessibility statement: a message that you place on registration forms and/or promotional materials to communciate your desire to meet participant needs. By adding this message to your materials, you are providing a mechanism for individuals with disabilities to express a need.
General Process
Students registered in a class can request accommodation through Student Disability Resources. Faculty and staff can request accommodation through the ADA Coordinator. If you are offering an event, you should include an accessibility statement on all promotional material or registration forms. This will allow individuals to express and accommodation need for the event.
Regardless of any requests for accommodation, it is best practice to generate live captions for all events. You can generate live captions using Zoom, PowerPoint, etc. The accuracy of this live captioning is approximately 85%. For information on how to generate Zoom live captioning, navigate to Option 1: Use Zoom Live Captions below.
If you use Zoom live captioning, the live captions become closed captions in the recorded video. If you did not generate Zoom live captions, you can request machine captioning through Kaltura, the University’s video server. For information on how to generate machine captions through Kaltura, navigate to Option 2: Add Kaltura Captions to a Recorded Video below.
If you have an accommodation request, you must provide a caption accuracy of 97%. Since Zoom and Kaltura only provide approximately 85% accuracy, you will need to secure a third-party live or closed captioner. For information on how to request third-party captions, navigate to Option 3: Requesting a Third-Party Captioning Service below.
For additional guidance on when live and closed captioning is required, please visit the following document: Live and Closed Captions. (You will need to log in to your Penn State Google account to access.)
Choose an option below based on your situation:
Option 1: Use Zoom Live Captions
Step 1: Change Zoom Account Settings
- Log in to your Zoom account online.
- On the left-hand side, click on Settings.
- On the sub-menu that appears to the right of Settings, click on In Meeting (Advanced).
- Scroll to find the Automated Captioning heading.
- Click the toggle on the right to on (blue).
- Scroll to the Full Transcript heading.
- Click the toggle on the right to on (blue.)
Zoom Account Settings
Manual Captions
You don’t need to allow manual captions unless there is an accommodation, but changing these settings now can save time later. The steps below outline how to establish these settings.
- Scroll to find the Manual Captions heading.
- Click the toggle on the right to on (blue.)
- Click the checkboxes for the options you choose: Allow host to type OR Assign a participant to type.
- Click the checkbox for Allow use of caption API token to integrate with a third-party closed captioning service.
- It is also recommended to toggle Save Captions, so that you and participants can save the transcript from the meeting. You can restrict this option to specific users, as well.
Language Interpretation
You can also enable language and sign language interpretation. The steps below outline how to establish these settings.
- Scroll to the Language Interpretation heading.
- Click the toggle on the right to on (blue.)
- In order to manage language interpretation settings from the general room setup settings, click the checkbox next to Enable language interpretation by default.
- Scroll to the Sign Language Interpretation View heading.
- Click the toggle on the right to on (blue).
- In order to manage sign language interpretation settings from the general room setup settings, click the checkbox next to Enable sign language interpretation view by default in scheduler.
Step 2: Enable Live Captioning during the Zoom Meeting
Each participant will need to turn on their own live captioning when they launch Zoom, unless they have selected to have automated captions on by default in their account settings (this applies to hosts and participants).
The following directions outline how to turn on live captioning in Zoom when they have not been enabled by default.
Note: Participants can also change their captioning settings and request that a full transcript be provided within the Zoom interface.
- On the Zoom toolbar, click on Show Captions.
- You may be prompted to set your preferred language. English is selected by default. Click the arrow next to Show Captions and another language if you’d like to change the language. Then click Save.
- Users can modify their own caption settings by selecting caption settings from the menu:
- Language
- Viewing a full transcript on the right sidebar
- Caption font size and color
- Enabling captions all the time

- Show Captions
Caption Settings
Personal Caption Settings
Note: The running transcript on the sidebar does not end up in the recording; however, the subtitles do.
All videos recorded in Zoom will populate into your Kaltura MediaSpace. Any live captioning generated during the event will carry over into Kaltura. You will just need to check it for accuracy.
Step 3: Enable Closed Captions in Player
All Zoom videos are saved in your Kaltura My Media. You will need to enable the Zoom captions (and transcript) on the Kaltura media player.
- Go to Kaltura.
- In the top right-hand corner, click on Log In Here and select Login.

Kaltura Log in Here
- Select Faculty, Staff, & Student Accounts. Provide your log-in information if you are not already behind Web Access. You may be able to skip this step.
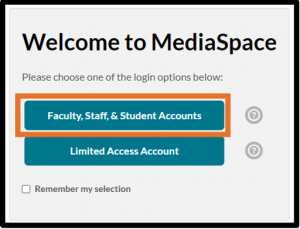
Faculty, Staff, & Student Accounts
- Click on My Media.
- Your Zoom recordings should populate into your Kaltura My Media. Scroll to find the video that you want to caption. Click on the title of the video.
- On the Media Page, Select Actions and Edit.

Actions/Edit
- Select the Captions tab. Click on the video player icon to display the captions on the play bar.
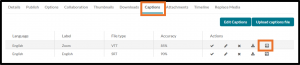
Captions Tab
- The CC button will display in the video player controls.

Kaltura Video Playbar


Option 2: Add Kaltura Captions to a Recorded Video
Step 1: Request Kaltura Machine Captioning
If you do not already have captions in your video, you can request them through Kaltura. Please note that captions in Kaltura also become the transcript. You can replace this transcript by uploading another file.
- Go to Kaltura.
- In the top right-hand corner, click on Log In Here and select Login.
Kaltura Log in Here
- Select Faculty, Staff, & Student Accounts. Provide your log-in information if you are not already behind Web Access. You may be able to skip this step.
Faculty, Staff, & Student Accounts
- Click on +Add New and select Media Upload. Drag and drop a file or Choose a file to upload. Provide any details about the file and allow it to upload. You may be able to skip this step if the video is already in Kaltura.
- Once the video is available, scroll to find the video that you want to caption. Click on the title of the video.
- Once your video appears, scroll down. Click on the arrow next to Actions and then select Caption & Enrich.
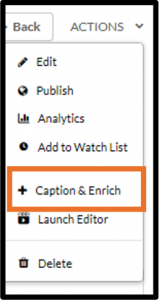
Actions/Caption & Enrich
- Scroll down under Order Captions & Enrichment Services.
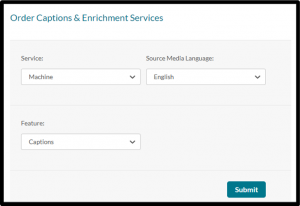
Order captions
- In the Service field, Machine should be selected.
- In the Source Media Language, choose the appropriate language. English is selected by default.
- In the Feature field, Captions should be selected.
- Click Submit. You will receive a notice that your request has been received.
- In a day (may be shorter), return to the media and select the arrow next to Actions and then select Caption & Enrich.
- Under Existing Requests, you will see the status.
- Once it indicates that it is complete, your captions are ready to be toggled on your video. Go to Step 2 below.
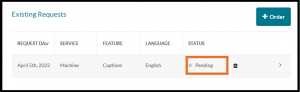
Request status


Step 2: Enable Closed Captions in Player
- If you are not already viewing the video, click on My Media. Then scroll to find the video that you want to caption and click on the title of the video. You may be able to skip this step.
- On the Media Page, Select Actions and Edit.
Actions/Edit
- Select the Captions tab. Click on the video player icon to display the captions on the play bar.
Captions Tab
- The CC button will display in the video player controls.
Kaltura Video Playbar
Step 3: Edit Closed Captions in Kaltura
Kaltura machine captions are approximately 85% accurate by default. This level of captioning is typically sufficient for the general population. You may choose to edit the closed captions at this point to improve the accuracy, but they are not required at this juncture.
If you receive a captioning accommodation request, you will need to either edit the machine captions in Kaltura or send the videos out to a third-party captioner to reach the level of accuracy needed for the request. The steps to edit captions in Kaltura are provided below. Information about how to request a third-party captioner are provided under Option 3: Requesting a Third-Party Captioner Service below.
- Click on My Media to display the list of all of your Zoom recordings and uploaded videos. Scroll to find the video that you want to caption. Click on the title of the video. You may be able to skip this step, depending on where you start.

Video Title List
- On the video page, click on the ACTIONS drop-down menu and then click Edit.
- Under the video, click on the Captions tab.

Video Tools
- On the right-hand side, click on the Edit Captions button.

Caption Requests/Edit Captions
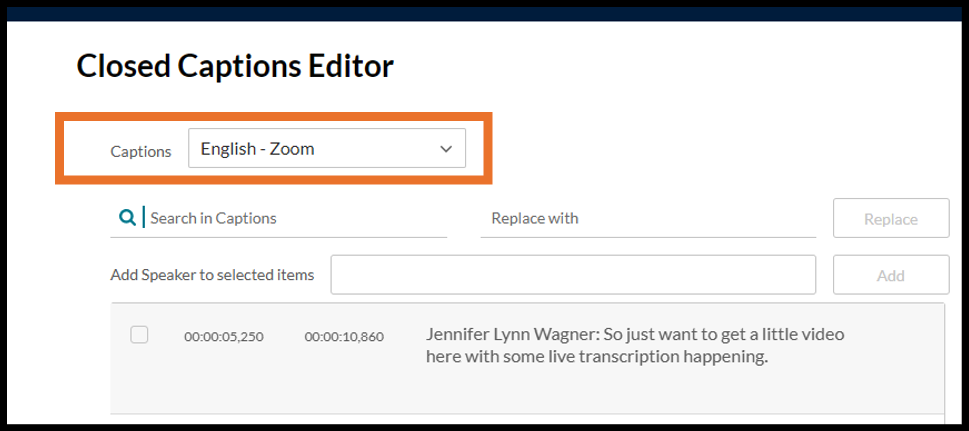
- In the Captions dropdown menu, pick the type of caption you wish to edit.
- English-Zoom is Zoom live captioning.
- English- English is Kaltura machine captioning.

Closed Captions Editor
- In the video player, select Play. Read along with the dialogue to confirm the captions. When you need to edit a caption selection, simply click into the caption section.
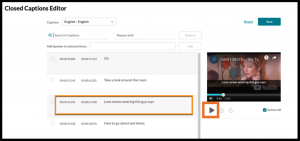
Caption that needs to be edited
- Edit the captions as needed. The correction will immediately display in the video player caption display.

A caption in the process of being edited
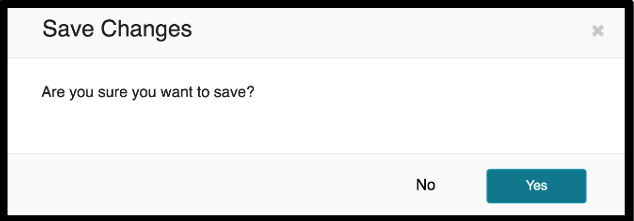
- Continue to verify and edit the captions. When you are finished, navigate back to the top of the page and click the blue Save button at the upper right, and then Yes (you do want to save the changes!).
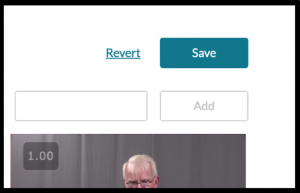
Save button

Confirm changes dialog box


Step 4: Add Collaborators in Kaltura for Editing
Adding collaborators in Kaltura will allow you to share the burden of captions with others. Some units hire student workers to do this work.
- Click on My Media to display the list of all of your Zoom recordings and uploaded videos. Scroll to find the video that you want to caption. Click on the title of the video. You may be able to skip this step.
- Under the video player, select Actions and Edit.
- Select the Collaboration tab; then, select + Add Collaborators.
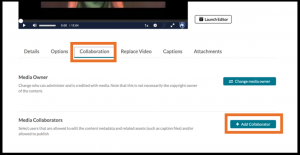
Collaboration Tab
- In the text field, type the Access ID of the person you would like to add as a collaborator and then hit enter on your keyboard. The name of the person will display as a dropdown option. Mouse-click on it to populate the text field as illustrated.
- Click the check mark next to Co-editor and then select the Add button at the lower right.
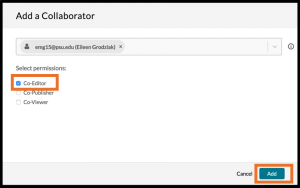
Add a collaborator screen


Option 3: Third-Party Live Captioning Service
Post-Production Captions
Instead of editing the captions in Kaltura, you can send videos out to a third-party captioning service to have accommodation-quality captions generated. These captions are called post-production.
For guidance on when these captions are required, review Post-production captions in the Captioning Decision Tree. Your department or unit will need to determine who is paying for the service. There is a list of vendors that have an established contract with the University and provide this service at a reduced cost. Review the information on each vendor (Automatic Sync, Verbit, and 3Play) and create an account for the vendor you choose.
Live Captions
You should place an accessibility statement on all registration forms and promotional materials for live events, so that potential participants can identify a need before the event. Note: Not including an accessibility statement on registration or promotional materials requires you to provide a third-party live captioner by default.
Automated live captioning through Zoom, PowerPoint, etc. is approximately 85% accurate. A live captioning accommodation request requires 97% accuracy. So, when an accommodation is requested, you will need to request a third-party live captioning service for your event. For more information on what warrants a third-party live captioning service, review the Captioning Decision Tree.
Your department or unit will need to determine who is paying for the service. There is a list of vendors that have an established contract with the University and provide this service at a reduced cost. Review the information on each vendor (Automatic Sync, Karasch & Associates, and Caption Advantage) and create an account for the vendor you choose.
You will need to enable the live captioner to remote into Zoom during the event. Note: You may have completed these steps when you enabled live captions in Zoom (above).
Directions for how to enable this are provided below:
- Log in to your Zoom account online.
- On the left-hand side, click on Settings.
- On the sub-menu that appears to the right of Settings, click on In Meeting (Advanced).
- Scroll to find the Manual Captions heading.
- Click the toggle on the right to on (blue.)
- Click the checkboxes for Assign a participant to type.
- Click the checkbox for Allow use of caption API token to integrate with 3rd-party Closed Captioning services.
- Once you are in Zoom, click the arrow next to Show/Hide Captions.
- Under Host Controls, select Set up manual captioner.
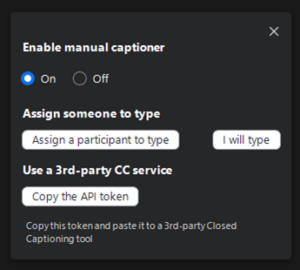
Host Controls Settings Menu
- Select the On option.
- Select either:
- Assign a Participant to Type
- I will type
- Copy the API token.
- If you select Assign a Participant to Type, you will have to select a participant to type in the room. If you copy the API token, you will need to provide the API token to the third-party captioner.